Why Apple Classroom should be a part of every teacher's tool kit
Teacher guide - Apple classroom
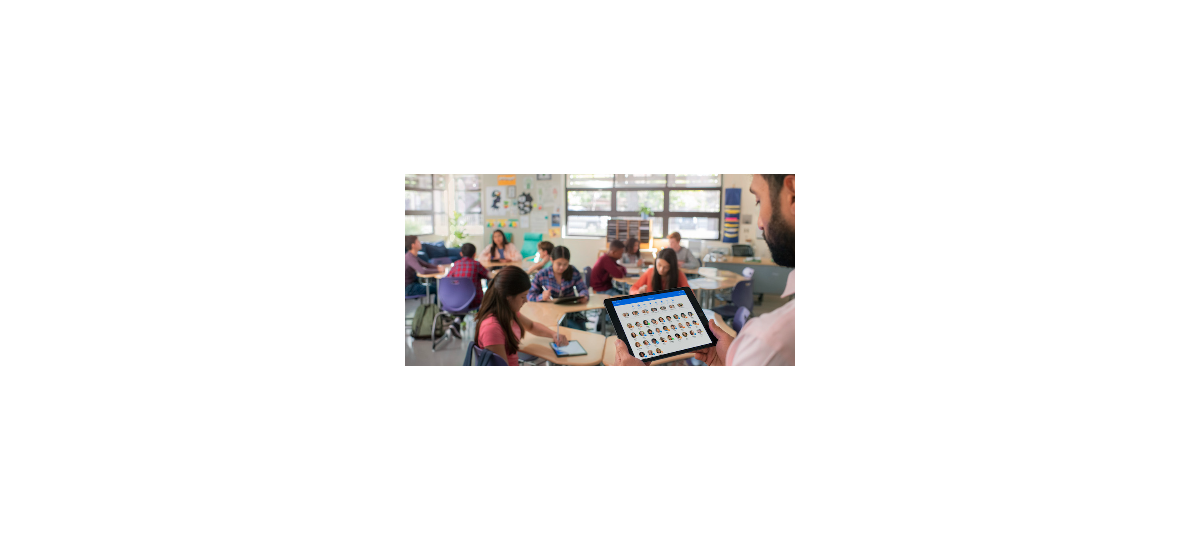
There are very few apps that have a bearing across all educational settings. Some are more geared up for subject specifics. Others steer older or younger. Some are just too techy! However, we can safely say that ‘Apple Classroom’ is a must for all teachers. The app itself enables teachers to connect with a full class of iPads. In doing so, teachers are able to interact directly with the learner’s devices. The overall result is that teachers oversee and can interject with everything that is going on (from a technological point of view) in the classroom. In this blog and teacher guide, we’ll look at how every classroom can benefit from the app.
One: Classroom Management
Apple Classroom enables teachers to guide learners through lessons. With the tap of a few buttons, teachers can open apps, webpages, or Apple books on every iPad all at once. This is useful for many reasons. Firstly, a lesson can easily turn on a dime. If teachers suddenly decide to move the children on or use a different approach, they can quickly guide the learners on to new resources. Secondly, pushing all the iPads onto an app almost instantly saves a huge amount of setup time. This can be done in seconds via the Apple Classroom app. However, the best thing about this feature is that it ensures seamless workflows. Moving from one app to another or navigating to a website can take (especially for younger pupils) time. The time that no teacher has. Moving the class along centrally means that the lesson isn’t impeded by technical misunderstandings. It’s a game-changer.
Two: Easy Differentiation
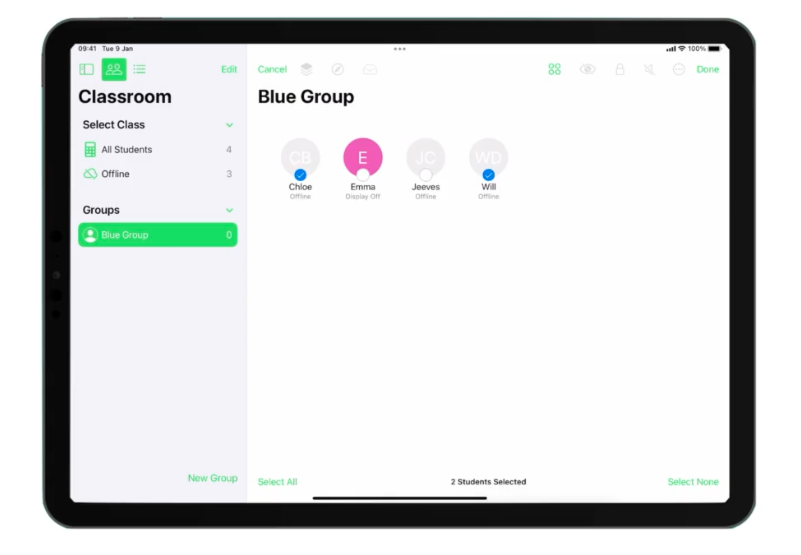
Differentiated activities can become a little bit like spinning plates. One activity is up and running over there. Another is kicking off over here. It’s challenging to keep on top of them all. Within Apple Classroom, a teacher can set up groups of technology. That means that teachers can send one table group off on one technological adventure and another table off on something completely different. Teachers can set up as many groups as they like and it’s easy to change or add groups at a moment's notice. It’s also possible to tap on an individual learner’s iPad and guide them to apps, books or webpages just for them. Personalised work can therefore be set up and pushed out from the teacher’s device. So to recap, teachers can guide all of the learners from one thing to the next; guide groups; or guide individuals. These layers of interaction save time and ease workflows, but they also provide some anonymity. A teacher can subtly provide differentiated work for a group or individual without drawing attention to it. It can literally silently appear on their screen.
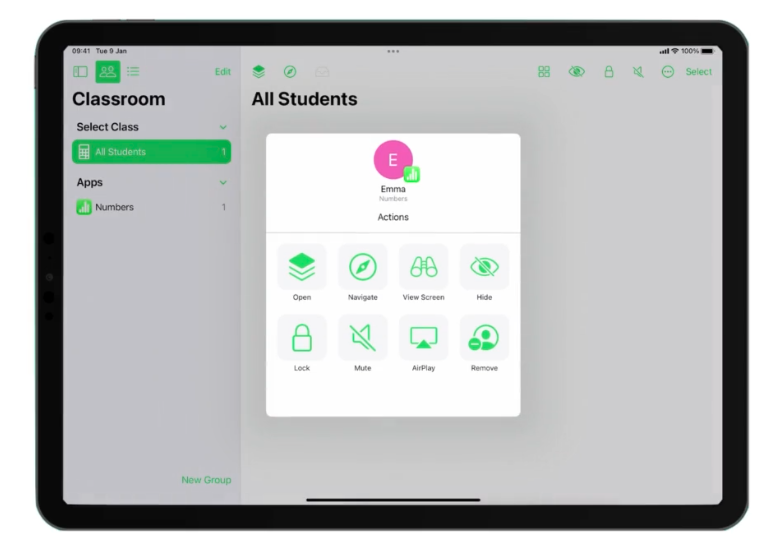
Three: Behaviour Management
Let’s face it! A class full of technology can be a daunting prospect. Having one eye on e-safety and the other on general behaviour management is difficult. Thankfully, Apple Classroom gives teachers more control over the technological goings-on. The app can enable teachers to lock the class set of iPads down entirely. With a tap of a button, devices will be placed on a lock screen where nothing can be accessed. The same functionality is available for differentiated groups and individuals. It is also possible to lock the class in applications. In other words, a teacher can guide the learners to a specific app and then stop them from leaving it for the duration of the activity (this is called ‘lock in app after opening). Moreover, Apple Classroom has a ‘view screen’ functionality for the entire class, groups or individuals. Essentially, this offers a bird's eye view for the teacher. On their device, they can see what each learner is doing at any given time. These elements of Apple Classroom will never completely solve all behaviour management issues (what can?) but it certainly goes a long way to provide each teacher with a level of control that is appropriate for any educational setting.

Four: Measurable Outcomes
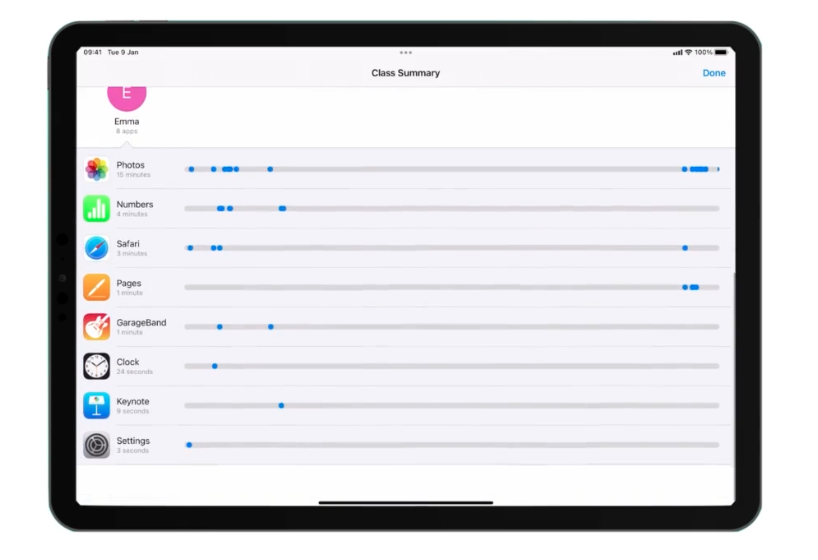
For many schools, one of the trickiest aspects of continuous innovation and technological progress in the classroom is monitoring the successes attached to iPad use. It’s not fair to ask teachers to evaluate their own technological practice and chart its impact, on top of everything else they are expected to do. Apple Classroom can help in this area. Every time an Apple Classroom lesson is finished, the app produces a simple screen of data. The data reveals what apps have been used during the lesson and shows teachers how long each app has been used. These simple figures can help individual teachers and an entire school to work out which apps are the most popular and ultimately what approaches are making the biggest educational impact. Most importantly, however, it does this without adding any more workload to anyone. After a while, this function may highlight apps that are no longer needed on the iPads. Equally, it may reveal a compelling argument to invest more heavily in certain apps. Used correctly, this element of Apple Classroom can provide all the evidence a school needs to continue embedding technology into day-to-day classroom practice.
Five: Sharing Work
The final aspect that I want to highlight is Apple Classroom’s ability to improve the digital workflow between teacher and learner. Firstly, when Apple Classroom is working away in the background AirDrop creates a sharing group just for the class. This means that the teacher can send the same resource (image, movie, screenshot, pages, keynote etc) to the entire class at the same time without having to post the file on a cloud-based storage solution. It works the other way round as well. Individual learners can send the teacher their finished piece of work and Apple Classroom will hold the work until the teacher decides to take a closer look. AirDrop options change automatically when a teacher uses Apple Classroom and so do AirPlay Mirroring options. Providing teachers have a mirroring solution connected to the classroom’s screen or projector, the teacher can now choose to mirror an individual’s iPad to the front of the class via Apple Classroom. For teachers, it’s an easy way of displaying good work without allowing anyone in the class to AirPlay mirror.
We’ve examined just five reasons why Apple Classroom should be a part of every teacher’s toolkit. However, there is a lot more to the app and it can make an impact in many more areas of day-to-day classroom practice. For me personally, the more I used Apple Classroom the less I needed to use it. As soon as my class understood what the app did general misbehaviour on the technology dissipated. I would lock the iPads from time to time and move the class on to apps every so often. However, Apple Classroom’s real trump card is the level of confidence it instils in any teacher. Having the app in the back pocket means that if a lesson is completely derailed, teachers can change the tide instantly. It’s an extra set of hands. It’s an extra observer. It’s the digital classroom assistant.
Teacher Guide – Setting up your own Class
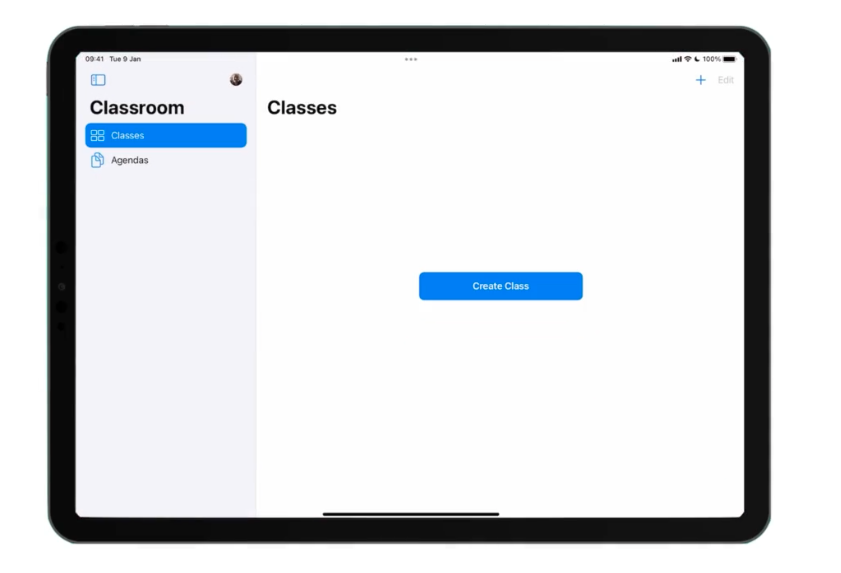
In the teacher guide, I’m going to talk through the process of setting up an unmanaged class. Before doing so, it’s important to make the distinction between unmanaged and managed classes (both setups result in the same functionality from Apple Classroom). A ‘Managed Class’ is set up centrally via a school’s Mobile Device Management system (most likely Jamf). An ‘Unmanaged Class’ is set up by individual teachers for their individual classes. The latter option means that anyone can set up an Apple Classroom and that is the process we are going to explore now…
Step 1: Adding Teacher Information
The first thing that appears in Apple Classroom for the first time is a prompt to type in the teacher's name. Typing a first name means the app automatically displays the ‘Teacher Name’ for the learners. A profile picture can also be added at this point. This isn’t an essential step and teachers can choose to forgo a photo. However, it’s worth doing if learners are moving from class to class joining multiple Apple Classrooms throughout the day, as it clearly differentiates the setup.
Step 2: Naming your Class
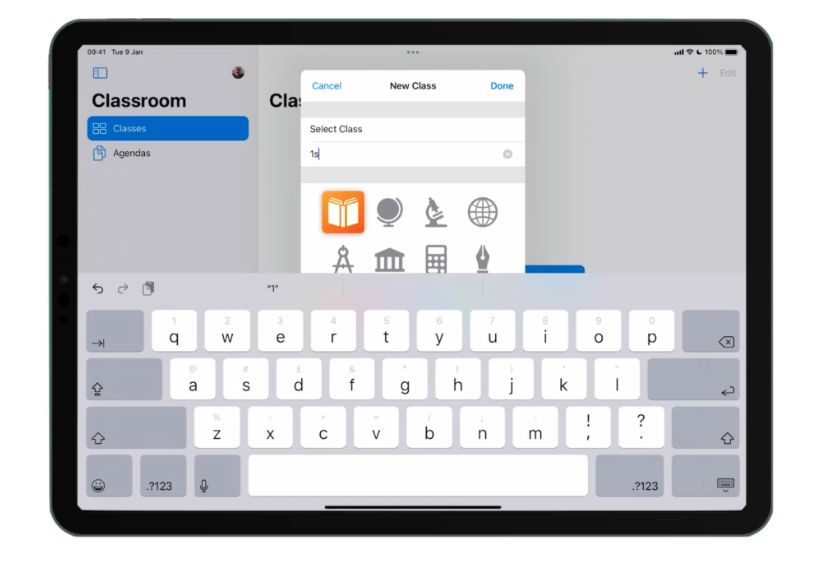
After adding basic teacher information users will be faced with a fairly blank screen with a blue button in the centre reading ‘create class’. When the button is tapped, the user will be prompted to fill in four things. Firstly, set up a class name. Secondly, type in a description (year group, subject etc). Thirdly choose a nifty icon that identifies with the class in some way. Finally, choose a class colour. If there are multiple classes, then it is recommended to set them each up with different colours and icons, making it super easy to tell them apart.
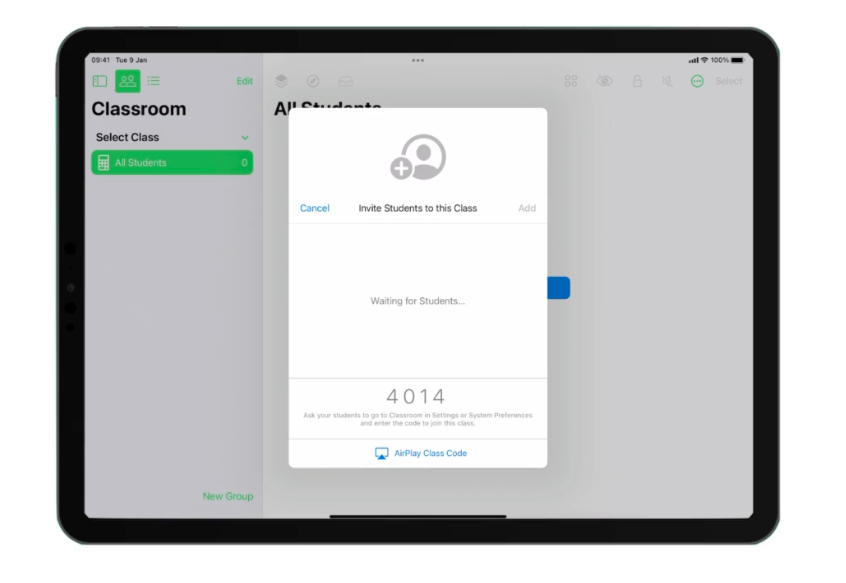
Step 3: Inviting Students into your class
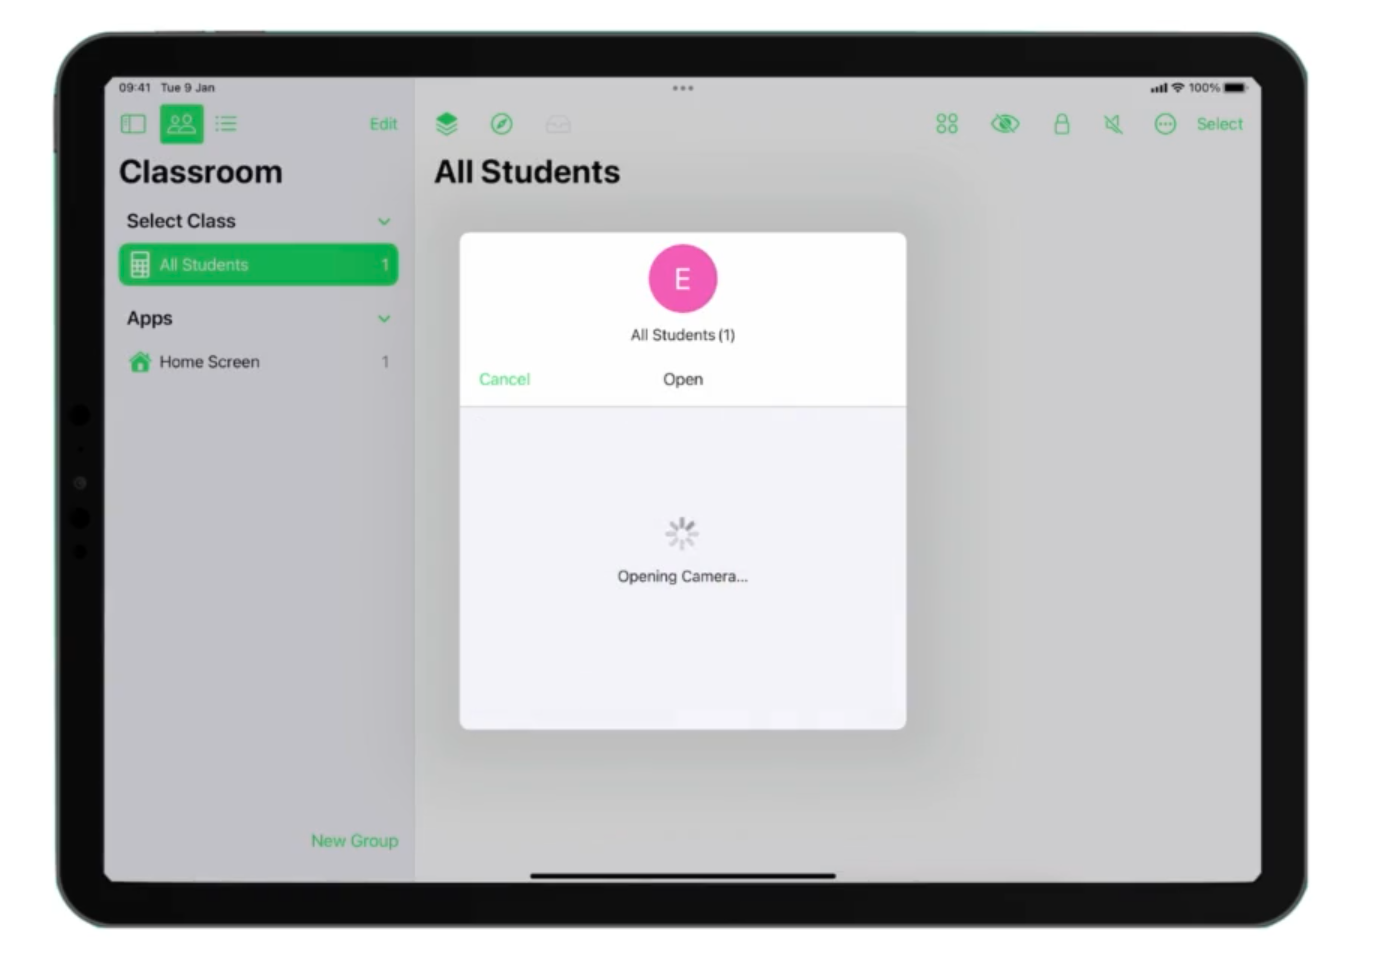
When the top-line details of the class are all set the next step is to add in some students. To do this, tap on the class just created and choose the option ‘Invite Students’. As soon as you tap on this option, the teacher iPad (the iPad that the Apple Classroom class is set up on) is essentially broadcasting out a signal to all other iPads on the same Wi-Fi. Apple Classroom will also be displaying a four-digit code. This is the key that allows access to the class.
Step 4: Connecting with Student iPads
The invite is sent, now the student devices have to accept the invitation. At this point, you can set up the class in two different ways. Either ask the learners in front of you to do this part (under your instructions) or set up each individual student's iPad yourself. For primary teachers, the latter option is probably the best one. In either case, the process is the same. On all the student devices, the teacher must open up the settings app. On the left-hand side, there are a list of different settings options. ‘Classroom’ will appear as the fifth option down (if it is not there immediately, give it a few moments to appear). Tap on Classroom to find an option, highlight in blue, to ‘add [insert name of your class here]’. Tapping on this ‘add’ button then prompts the teacher to type in the student's name and the four-digit code displayed on the teacher iPad’s Apple Classroom. Finally, tap on ‘add’ in the top right corner. If you are setting up a class set of iPads (as in, iPads that do not belong to individual students) then I would recommend typing in the iPad’s number rather than a student’s name. If you haven’t numbered your class set of iPads, then this would be a good opportunity to do that.
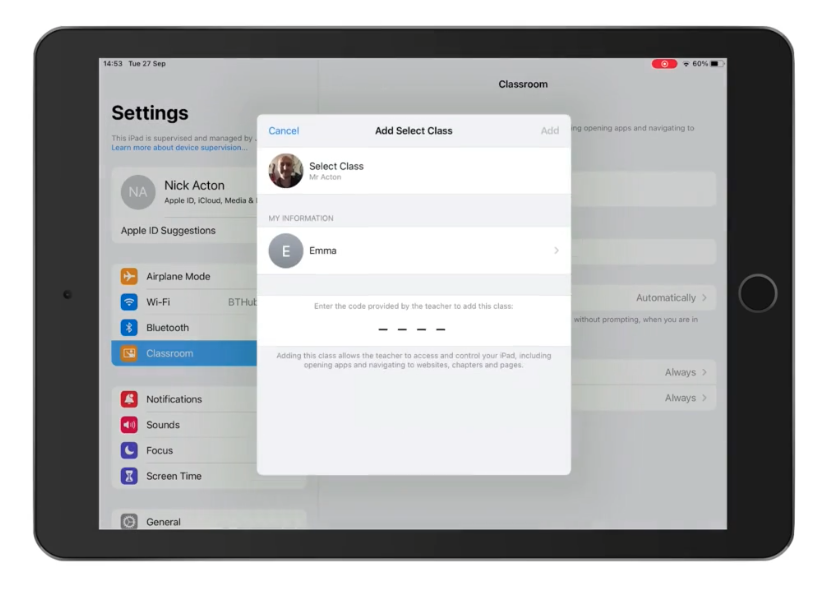
Step 5: Securing the Class
As a quick tip, when setting up each individual student's iPad, make sure to change the two additional settings at the bottom of the screen from ‘ask’ to ‘always allow’. If you leave the setting on ‘ask’, the students will be ‘asked’ if it is okay for the teacher to control their iPad in some way. For example, if a teacher uses the lock functionality on their Apple Classroom, it will ‘ask’ the students if they are happy to allow the teacher to do so. If the teacher is setting up each student iPad by yourself, make sure you repeat step 4 and 5 on each iPad. If you are instructing students to help with the setup, make sure they all strictly follow the instructions in Step 4 and 5.
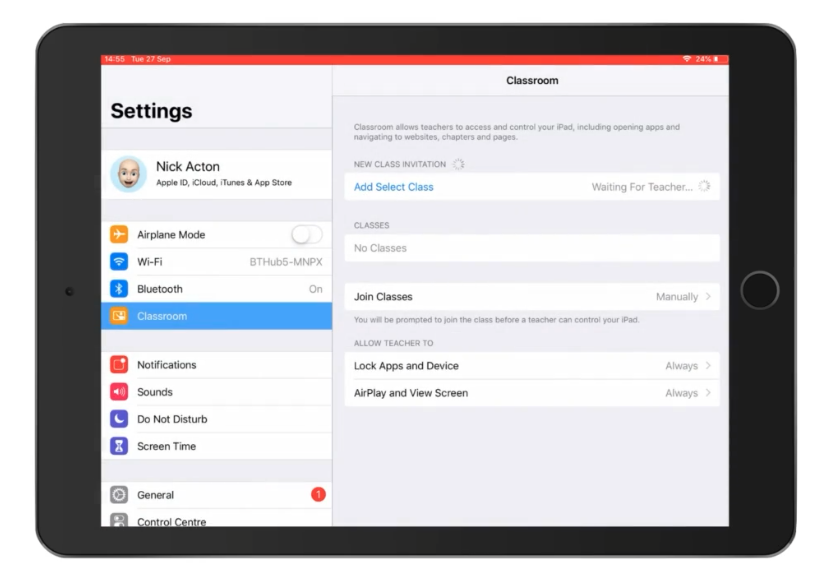
Step 6: Checking the Student Numbers and Starting to use Apple Classroom
On the teacher iPad, you’ll find that as steps 4 and 5 are being completed, the student names will begin to appear on Apple Classroom along with coloured circles depicting each student’s initials. You can check through these names / circles to make sure you have everyone in your digital class before tapping on ‘add’ in the top right had corner. This is the final step of letting your student’s iPads into your Apple Classroom. From then on, the app is fully operational, and you will be able to use all of the brilliant tools explored in the blog.
That covers the initial set up of your own class. If a new student joins, simply repeat the process to add them in with everyone else. A ‘Managed Class’ is preferable as it means classes can be set up centrally and ultimately, the technical bit is taken out of the teacher's hands. If you would like to learn how to set up Apple Classrooms centrally, please don’t hesitate to get in touch. For a full course on Apple Classroom, please consider joining ‘Select Academy’ (our online training platform). Select Academy is a huge resource filled with instructor lead courses that are entirely focused on using technology in the classroom.